Wix Accessibility Enabler Installation Guide.
This article shows you how to easily install Accessibility Enabler on your wix website. To install the Accessibility Enabler on the website, follow these steps:
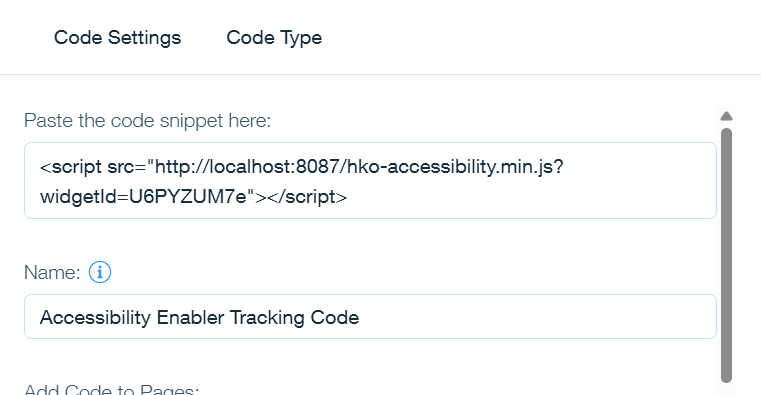
1. Copy the Accessibility Enabler script that is given to you during the onboarding process.
The script is given when you create an Accessibility Enabler account. If you don’t have an account yet, please create a free account here. After creating your account you will be taken through a user-friendly, short onboarding process.
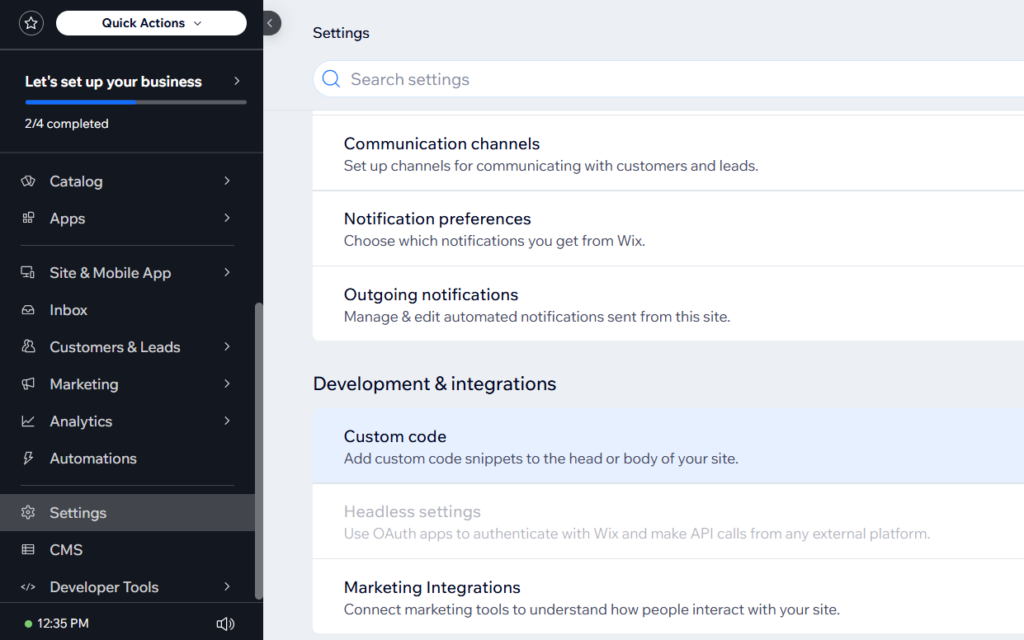
2. Log in to the Wix admin dashboard
3. Click on Settings from the left side menu and click on the Development & Integration > Custom Code option menu
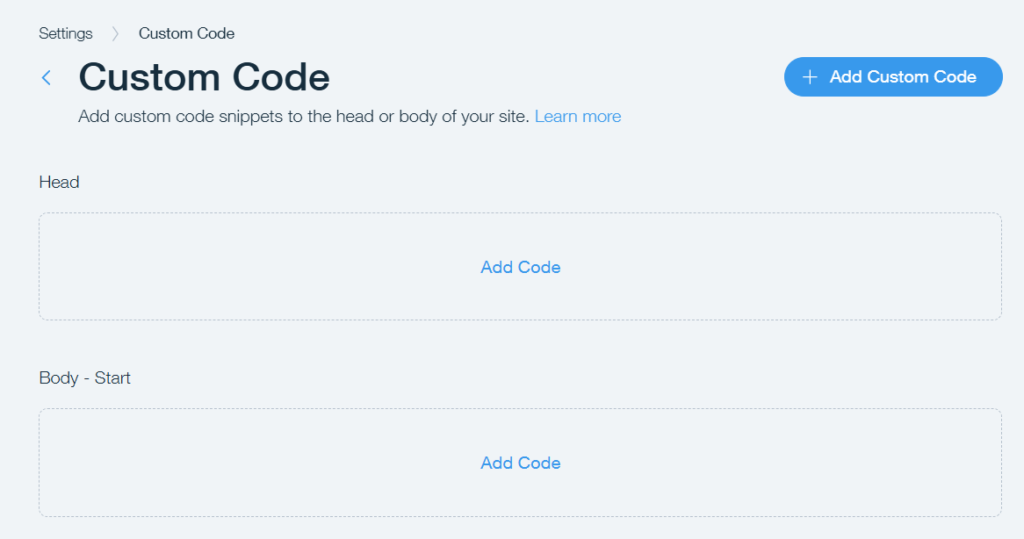
4. Next, click the Add Custom Code button, and you will get an Add Custom Code pop-up.
5. Add your JavaScript Tracking Code in the Text Box given and give it a name ” Accessibility Enabler Tracking Code”
6. Under Add Code To Pages Section select the options as shown in the screenshot below
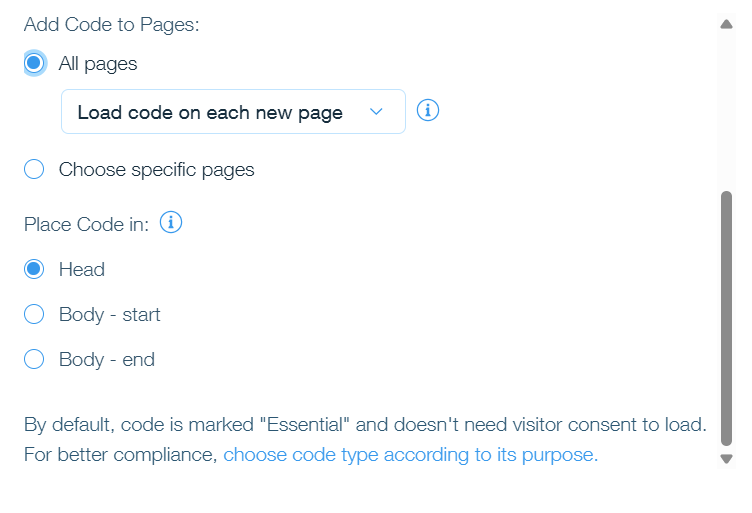
8. Now click on Apply button
9. Go to your website frontend and you must see the Accessibility Enabler icon along the Right-hand side.